It’s very rare that I publish something on this website that isn’t directly related to one of my books. I’ll post about events and giveaways, perhaps, but seldom anything related to my personal life or interests.
Well, today I am making an exception.
In all my social media profiles…
Author of Fender & The Fifteenth of June. Husband, two dogs, bearded cyclist, mediocre guitarist.
…as well as in my author blurb, I make sure to mention that I’m a mediocre guitarist. Mediocre might even be generous, in fact, considering that I’ve been playing guitar for almost twenty years. I’m a hack guitarist, but I’m somehow even worse at working with my hands.
I own two Les Paul electric guitars—one Gibson and one Epiphone—and I had been thinking for a while about purchasing a Stratocaster, especially after writing my second novel, Fender.
So I decided, in an effort to get what I wanted—as well as a reason to challenge myself—that I’d attempt to build my own Stratocaster. A Partscaster or Frankenstrat, they are sometimes called.
I documented the journey, taking photos (almost) each step along the way, and I thought I’d publish it here for anyone who might be interested.
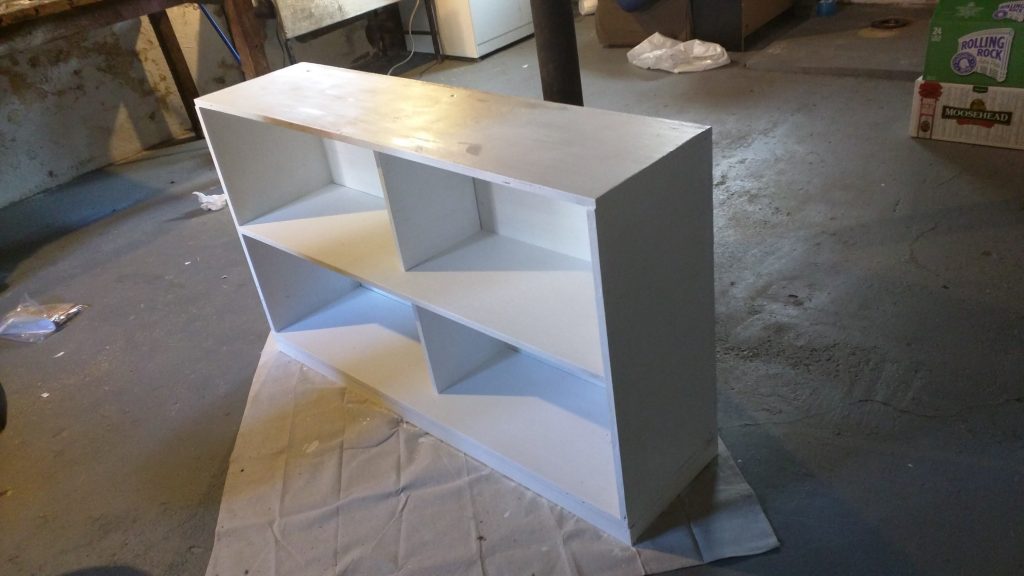
Prior to this guitar, the only thing I had ever built—excluding the assembly of Ikea furniture—was this bookcase for my wife:
Doesn’t look so bad in the photo, but up close, it’s easy to tell how uneven and crooked it is. Surfaces are rough, too. Still, it came out sturdy and functional, so I guess that’s the main thing.
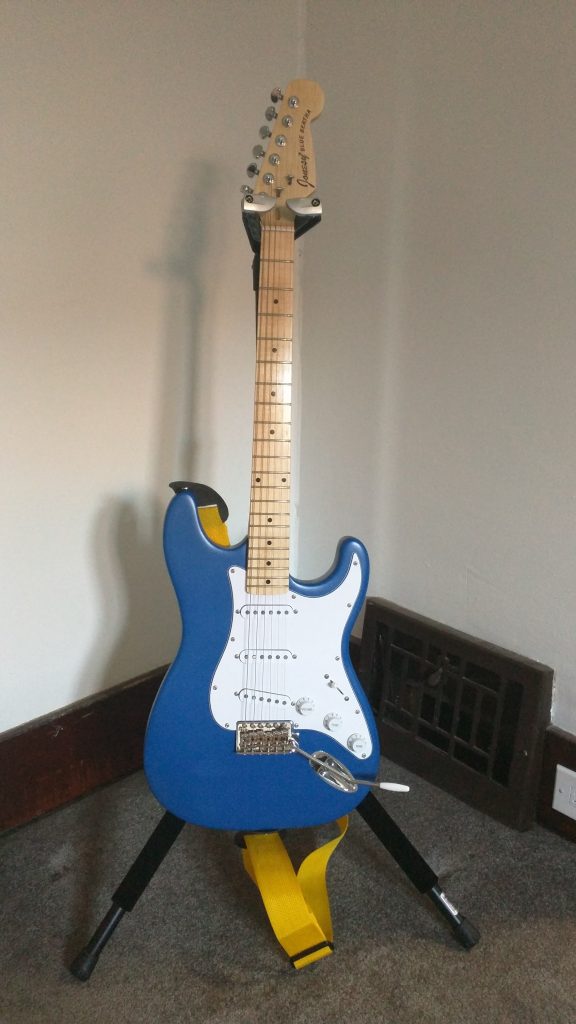
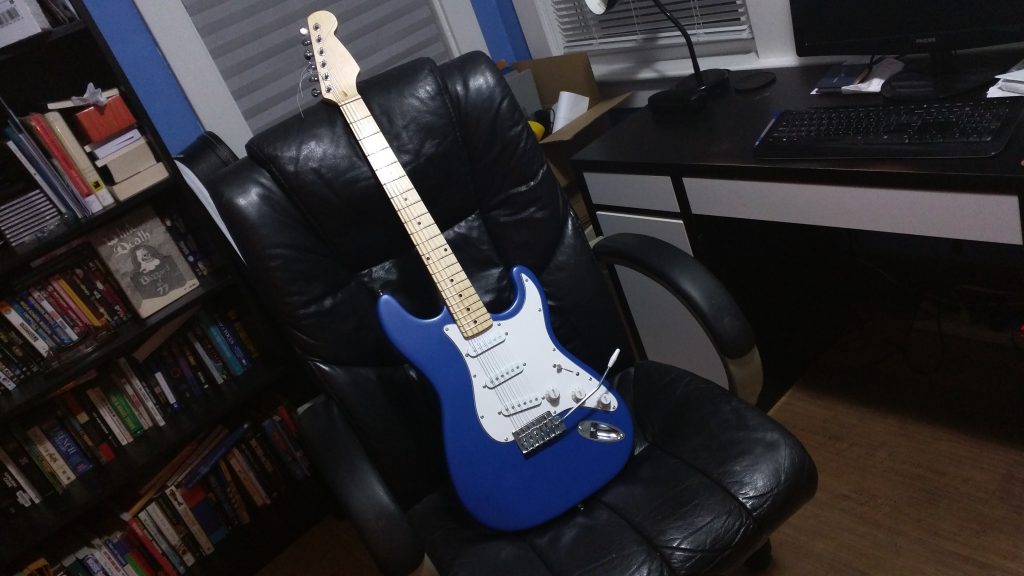
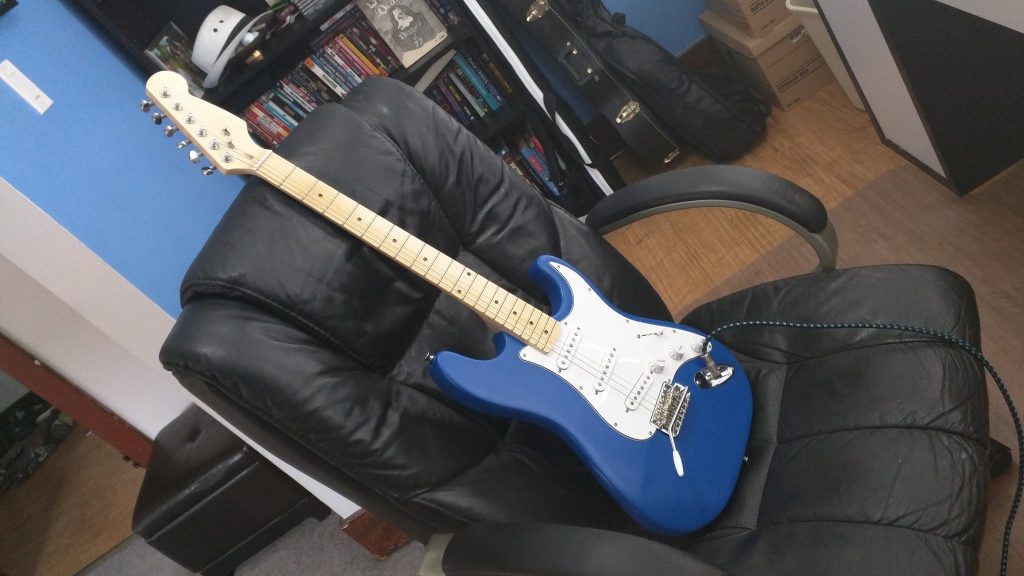
All right, before we begin, let’s take a look at the finished product:
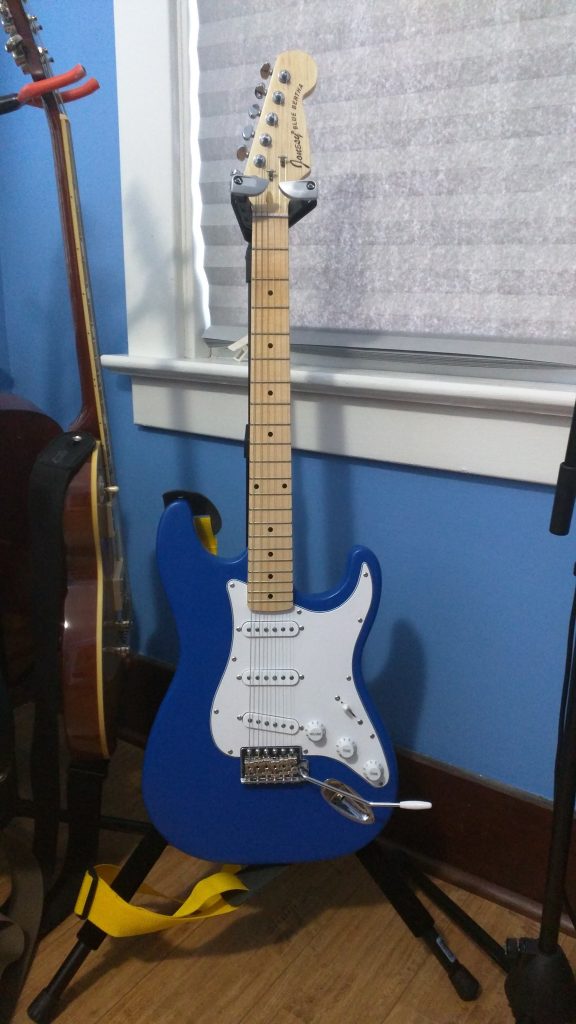
And here’s Blue Bertha in different lighting:
And here’s my best attempt at sharing a few technical specifications:
Body
Body Material: Basswood
Body Finish: Satin
Body Thickness: 1 11/16″
Body Shape: Stratocaster
Neck
Number of Frets: 21
Inlays: Black Dots
Fretboard Radius: 12″
Fretboard Material: Maple
Neck Material: Maple
Neck Finish: Satin
Nut Width: 1 5/8″
Scale Length: 25.5″
Neck Plate: Standard 4-Bolt
Electronics
Pickup Configuration: S/S/S
Bridge Pickup: GFS KPS72 “Premium II” Alnico II (6.0 K)
Middle Pickup: GFS KPS71 “Premium II” Alnico II (5.5 K)
Neck Pickup: GFS KPS70 “Premium II” Alnico II (5.3 K)
Pickup Switch: CRL 5-Way Lever Switch
Control Pots: 250 K CTS Control Pots (3)
Controls: Master Volume, Tone (Neck), Tone (Middle)
Hardware, Machines, Accessories & Miscellaneous
Bridge: 10.5 mm Chrome Tremolo With “Shorty” 39 mm Brass Block
Tuning Machines: Grover Mini Locking Rotomatics (406 Series)
String Guides: Fender American Standard String Guides
Tremolo Arm: Full-Sized Hardened Steel Tremolo Arm
Strings: Ernie Ball Regular Slinky 10-46 Gauge
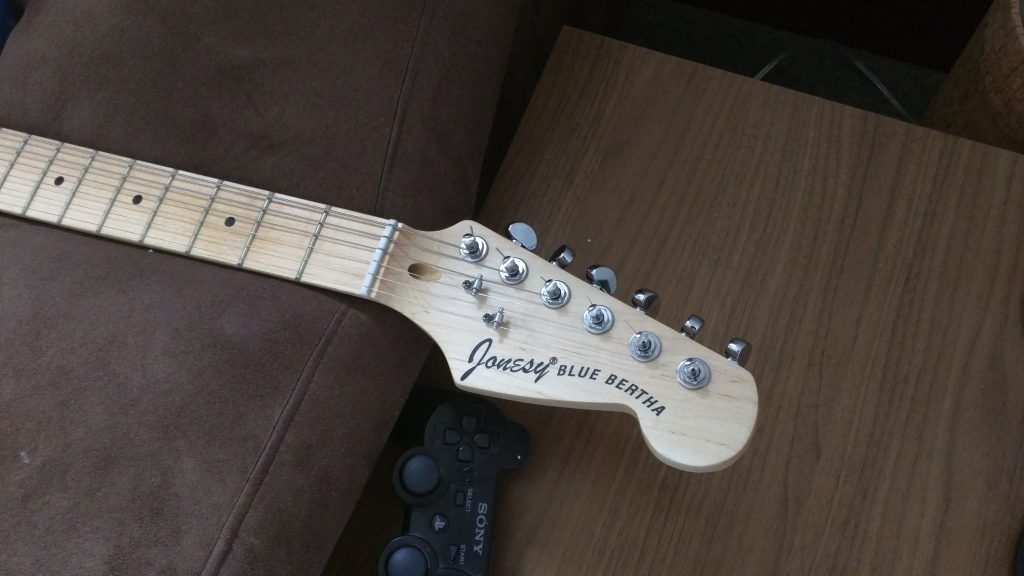
Unique Features: JONESY® Blue Bertha Custom Headstock Decal
Pickguard: 3-Ply, W/B/W
Needless to say, I am ecstatic with how the final product came out. The JONESY® Blue Bertha looks good, plays well, and cost me about $589 CAD (before taxes and shipping) to build, which is less than buying a “Made in Mexico” Fender Stratocaster (Standard, $799.99 CAD), but a little more than an import Squier Stratocaster (Deluxe, $399.99 CAD).
That’s about $469 USD for my American friends, or £349 GBP for my English friends.
It’s worth mentioning, however, that some of the supplies I bought (included in that $589 CAD figure)—such as wire strippers, nylon string, steel wool pads, foam brushes, sandpaper, a soldering iron, and so forth—can be reused on future projects. It’s probably more fair to say there’s less than $500 CAD in parts and supplies in Blue Bertha.
And some of those parts and supplies, as you’re about to see, were unnecessary purchases at best.
I’ll give you a breakdown of exactly what I used in the build below and how much each part or supply cost. Please note that almost all purchase amounts will be stated in CAD.
If you’d like to hear what Blue Bertha sounds like, I can’t offer you much. Aside from being a mediocre player, I don’t have much to record with. Even if I did, listening to a nice guitar played through cheap computer speakers—or worse, a smartphone speaker—is a bit like watching a Blu-ray movie with both eyes squinted.
Here’s a really simple pickup demo I put together, playing each of the five pickup positions using clean settings on my amplifier:
And here’s a short clip of me noodling on Blue Bertha with a blues track in the background:
Refer to previous point about being a “hack” guitarist…
All right. Enough of the technical stuff. Let’s talk about the build. Ready to begin?
Let’s go.
Finishing the Body & Neck
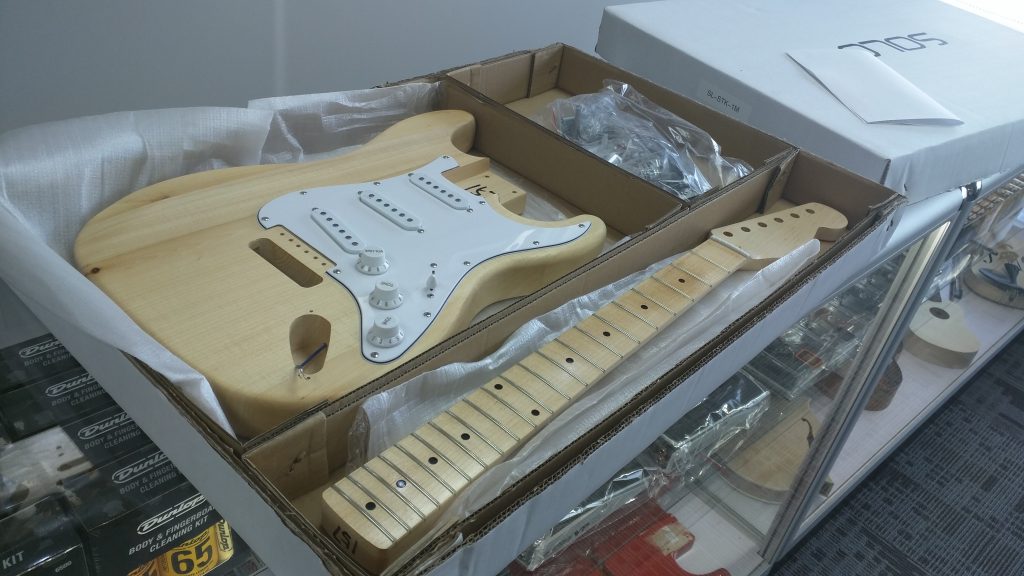
This build began with me picking up a Stratocaster kit from SOLO Music Gear in Mississauga for $139.99 CAD:
I really didn’t intend to use much of the hardware that came with the kit itself, aside from a few basics, like the pickguard, volume and tone knobs, back plate, and neck plate. I figured the body and the neck, however, would both be excellent for my first guitar build.
If I don’t specify using an upgraded component below, please assume that I’m using whatever came with the kit, okay?
Anyway, I met with Matt McWaters at SOLO Music Gear and we talked for a few minutes before I was on my way—super nice guy! Very helpful, and he assured me that his team inspects each kit before selling it, and that the frets had already been properly leveled and dressed. That was good news, because those were tasks I was hoping not to attempt to do on my own.
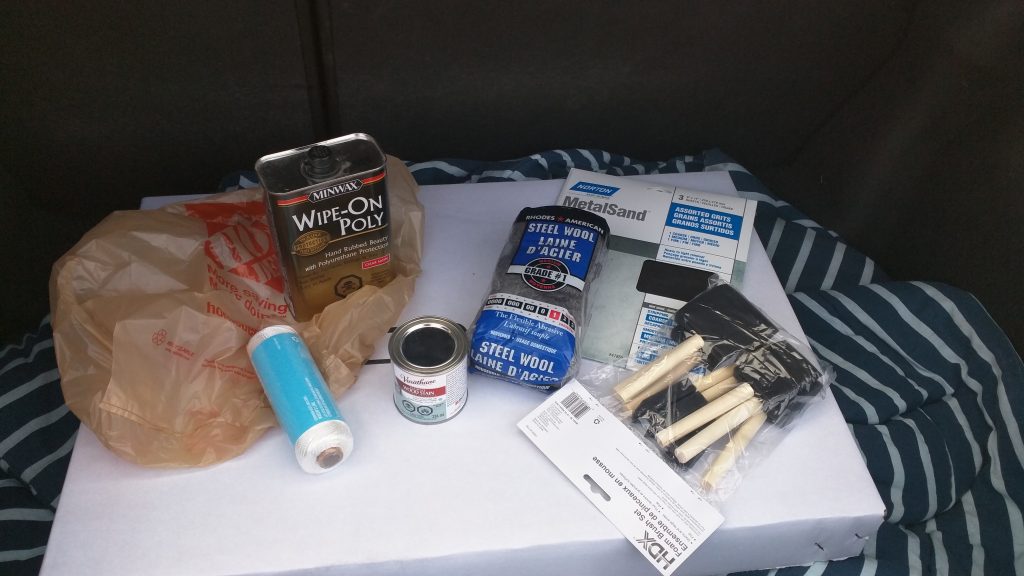
I made a stop at Home Depot on the way home to pick up some finishing supplies—different grits of sandpaper, blue stain, wipe-on satin poly by Minwax, steel wool pads, some thin nylon rope, and foam brushes. $60.63 CAD in supplies in all:
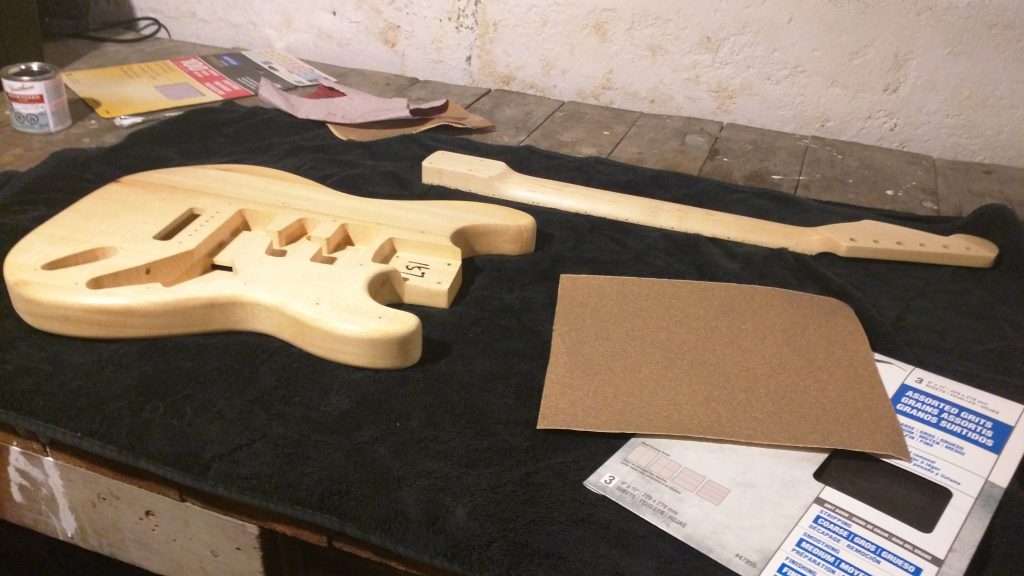
My plan here was to sand the poly resin off the body—all SOLO Music Gear kits are sealed with this stuff—and apply the blue stain I purchased. I returned home and removed all the electronics:
I took a quick look at the instructions on the can of stain, and it suggested sanding the wood to 220-grit. Well, all I had on-hand was 80-, 100-, and 120-grit, and it turns out I had picked up “MetalSand” sandpaper from Home Depot, too.
D’oh!
Not off to a great start, but I hoped for the best.
I sanded carefully with each grit, until I was certain all the poly resin coating was gone.
I wiped off all the dust, dirt, and debris from the body, gave the stain a shake, popped it open, and… well, I instantly felt buyer’s remorse. This color was labeled “bleached blue” but it looked more like a dull version of that Daphne blue color we see on vintage Stratocaster guitars.
Still, I had a sneaking suspicion it would dry darker than it appeared wet, so I strung up the body above my work bench, and applied a coat of stain using the foam brushes.
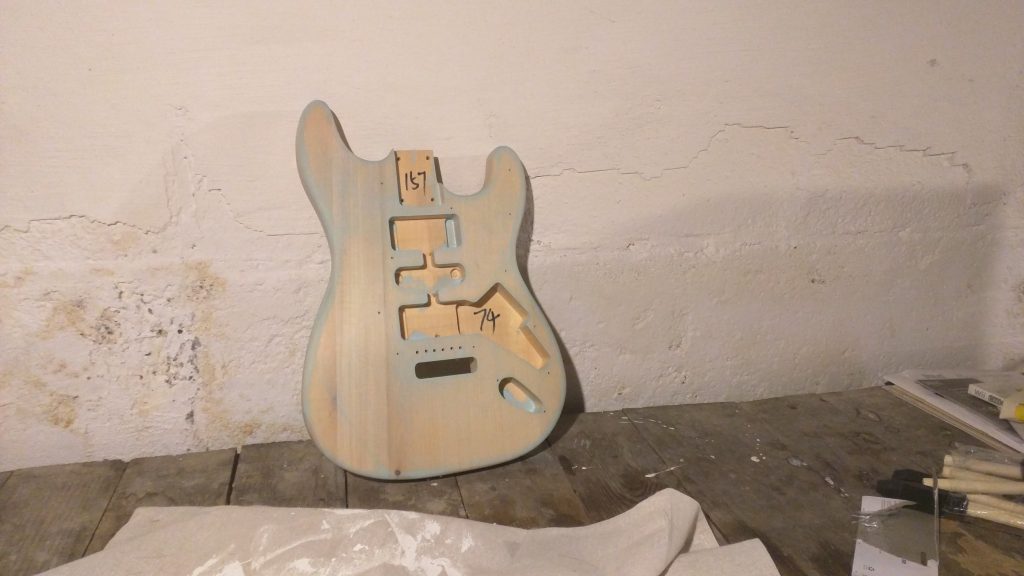
But after wiping off the “excess” stain with a clean rag, here’s all that remained:
Not so good. It seems the body absorbed very little of the stain, which suggested to me that:
- I didn’t prepare the wood properly to receive stain,
- I didn’t sand adequately,
- Basswood doesn’t like absorbing stains, especially light stains, or
- The stain itself was junk.
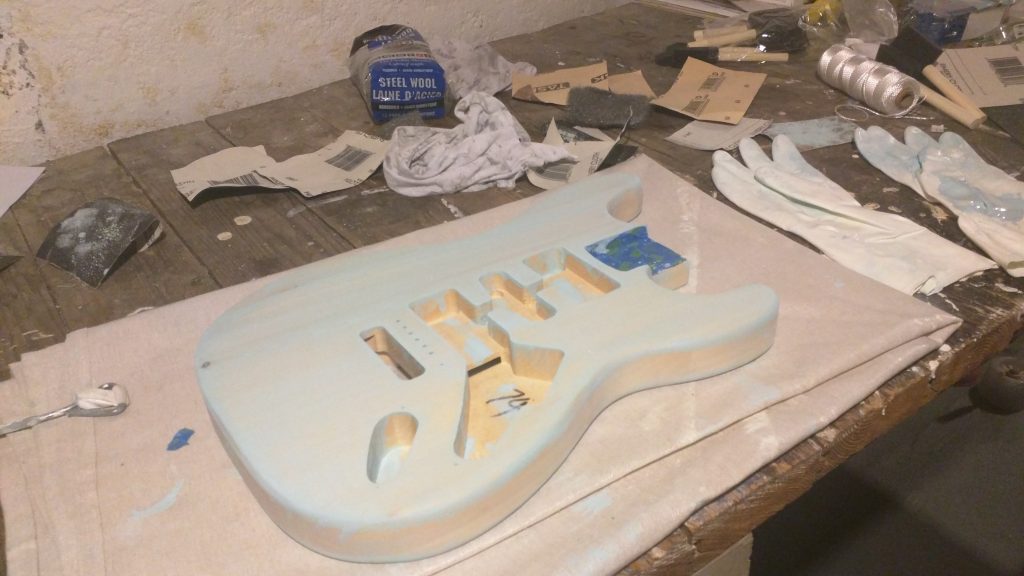
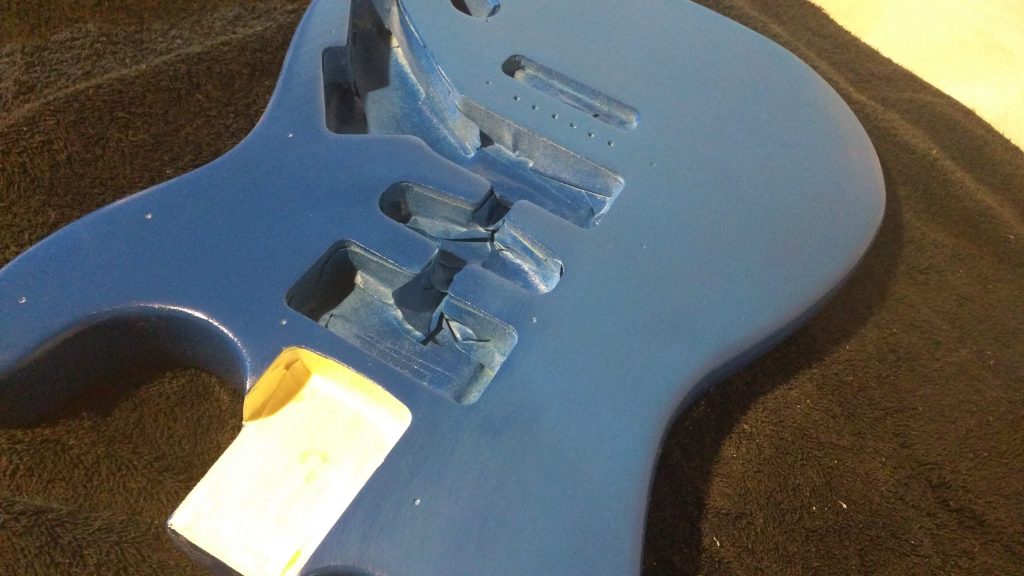
I decided that sanding was the only thing I could control at that moment, so I sanded more, then stained again. Sanded, stained. Sanded, stained. Sanded, stained, over the next day or so. About five or six times per side, I would guess, which seemed like too many times, but I kept thinking the finish might come out better, more even, darker.
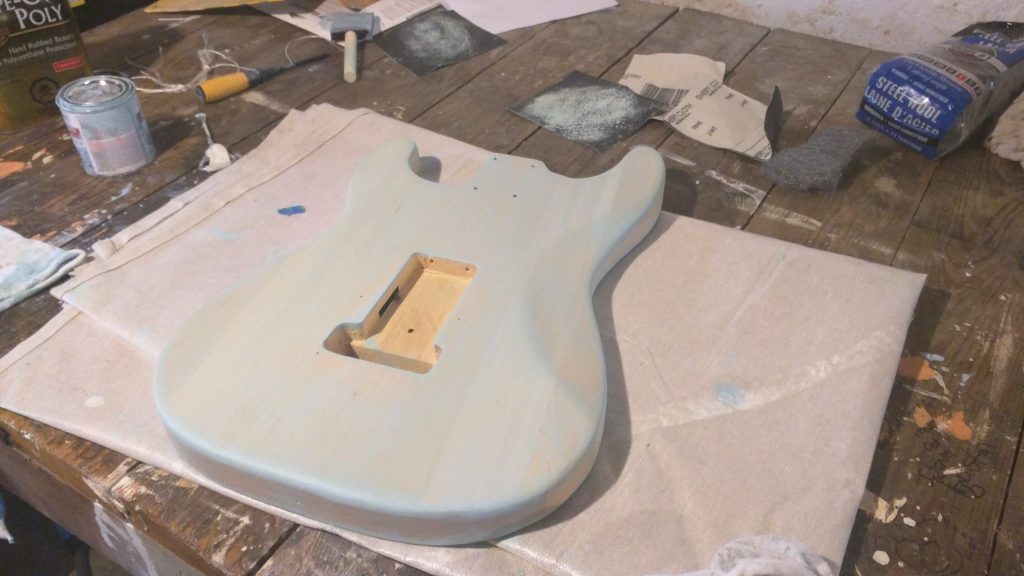
In the end, the front of the body looked like this, before I got to tackling the sides:
And the back looked like this:
There were still spots that, no matter how much I sanded, wouldn’t soak in much of the stain. And I hated the color, to tell you the truth. But the stain did have sort of a vintage vibe to it. It looked almost reliced and worn, especially around the edges. Perhaps I could learn to like it, I thought…
…but after another day or so passed, I realized I was only kidding myself. It was time to ditch the stain and move on to something an amateur like myself could do with a little more ease—spray paint!
I reached out to Brad Angove—YouTube how-to video superstar—to ask for help with the finish. I’d watched a number of his videos on finishing guitars, and he makes spray painting look so simple.
Here are a few of his videos you might like to check out, if you’re thinking of finishing your own guitar:
- How to paint your guitar with spray cans
- How to finish a guitar neck
- How to paint your guitar by hand: Applying the clear poly
- How to turn gloss paint matte or satin
After talking with Brad via Facebook, I set out to Canadian Tire and bought another $29.94 CAD in supplies—spray primer, spray paint, fine Scotch-Brite pads, 100- and 220-grit sandpaper (for wood), and some extra reusable cloths.
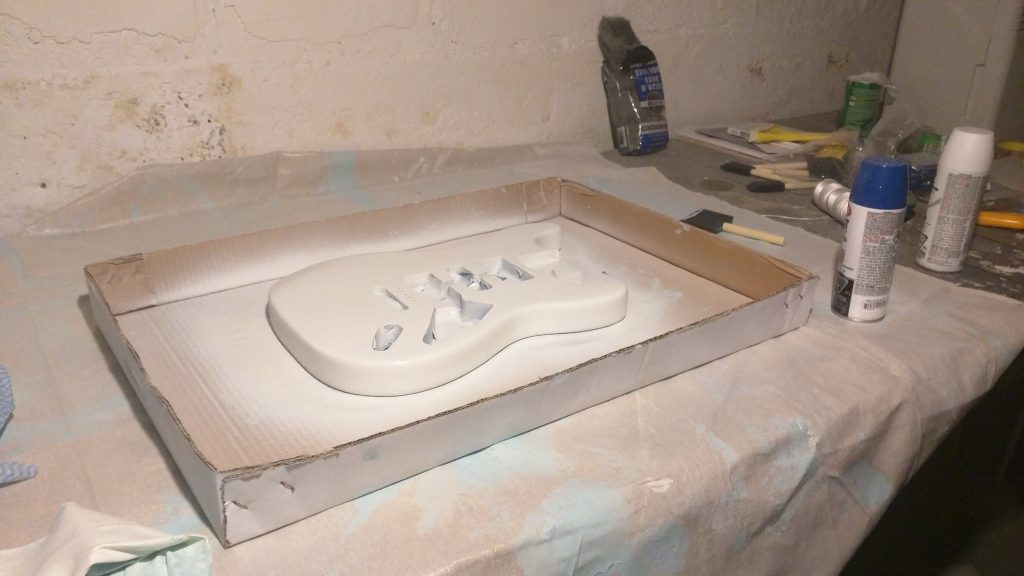
I gave the body another sanding with 100- and then 220-grit paper, wiped off the dust, and applied two coats of primer, about fifteen minutes apart:
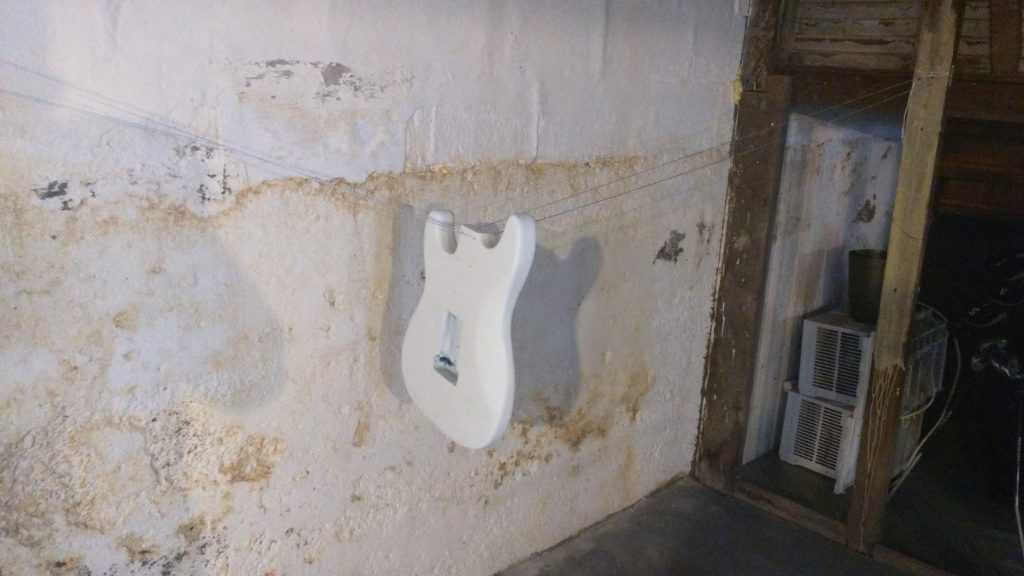
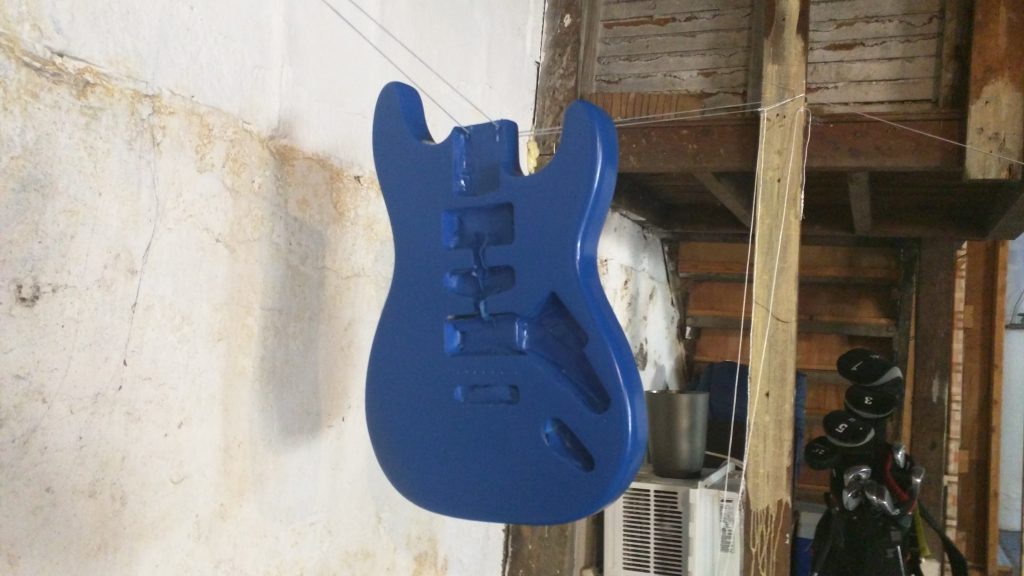
The next morning, it was smooth to the touch, except for a few bits of dirt or something that got stuck to the surface. This was likely caused by letting the body sit in a dirty cardboard box overnight on my workbench. I sanded the primed surface down smooth again with 220-grit paper, then strung it up before painting to avoid having the same thing happen:
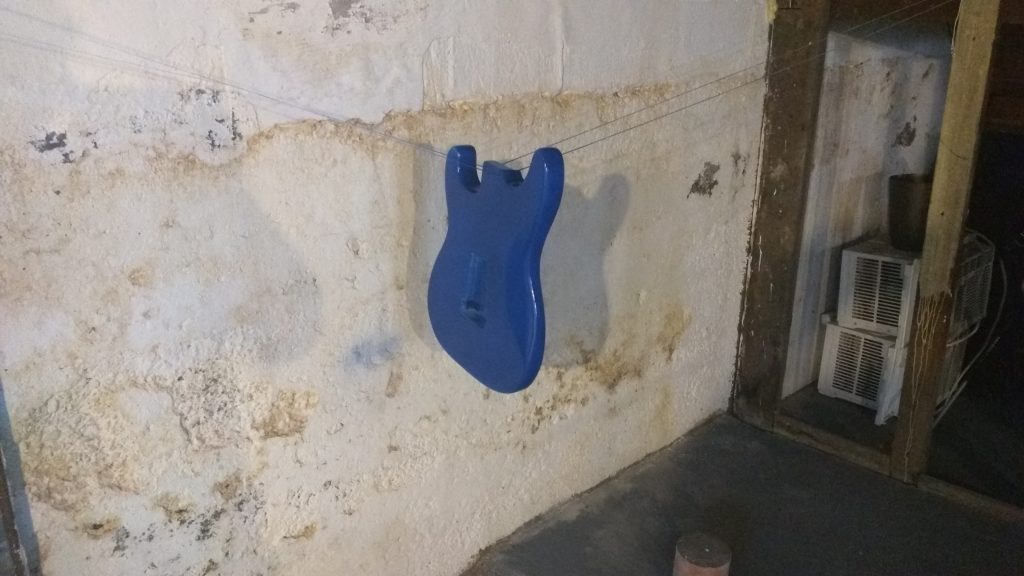
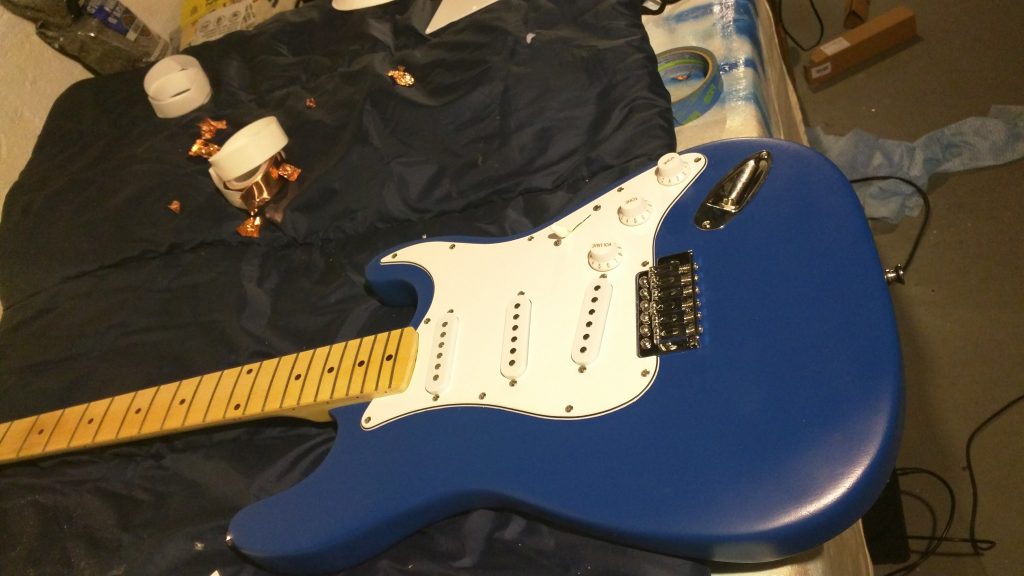
And then I applied two coats of glossy blue spray paint:
I loved how the blue color came out, especially as it dried. The goal was to have a satin finish, however, so Brad suggested that I scuff down all the shine with a fine Scotch-Brite pad before applying a satin clear coat. I grabbed a spray can of satin clear from Canadian Tire for $6.49 CAD, and waited eight hours.
Here’s how the body looked as I scuffed down the shine:
You can see part of the body is scuffed down to a matte finish in this photo, and the other part not. Looking good, right? So far, so good?
Wrong.
When I got to scuffing the edges, I must have rubbed too hard, or not given the paint long enough to dry, because bits of paint chipped right off. I now had to string it back up, paint the thing again (three coats), but this time, I waited a full twenty-four hours before attempting to scuff down the shine.
The second time I was successful—no chipping the paint!
I strung the body up again and moved on to applying the clear coat. And here’s how it looked, still wet, after applying three coats of clear satin:
(Also, a lesson I learned the hard way, don’t spray clear coat in a basement with windows that don’t open…)
All I could do now was leave the body hanging to dry, hope for the best, and turn my focus to the neck.
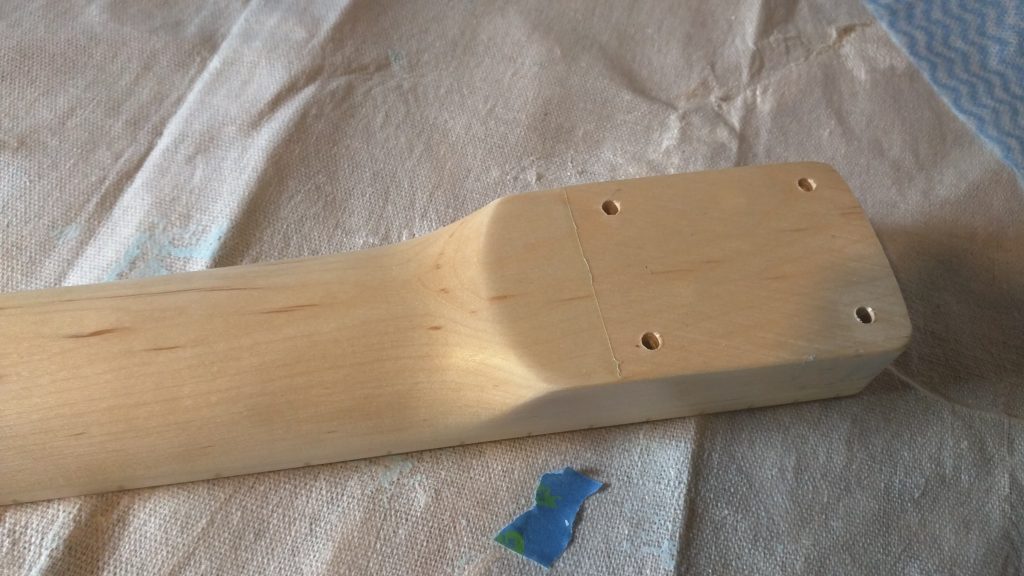
There wasn’t much to do with the neck—I intended to sand off the poly resin sealer and really smooth it out. It felt rough to the touch, so I wanted to see if I could fix that.
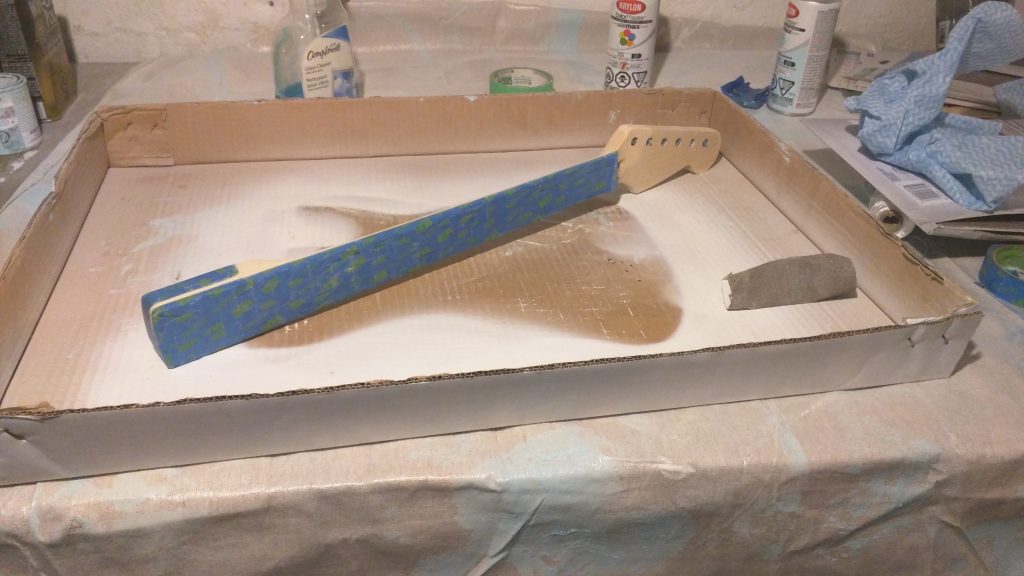
I taped off the fretboard with masking tape, making sure to also stuff the tuner pegholes and truss rod opening, and carefully marking and sealing off the areas that would later need to fit in the neck pocket:
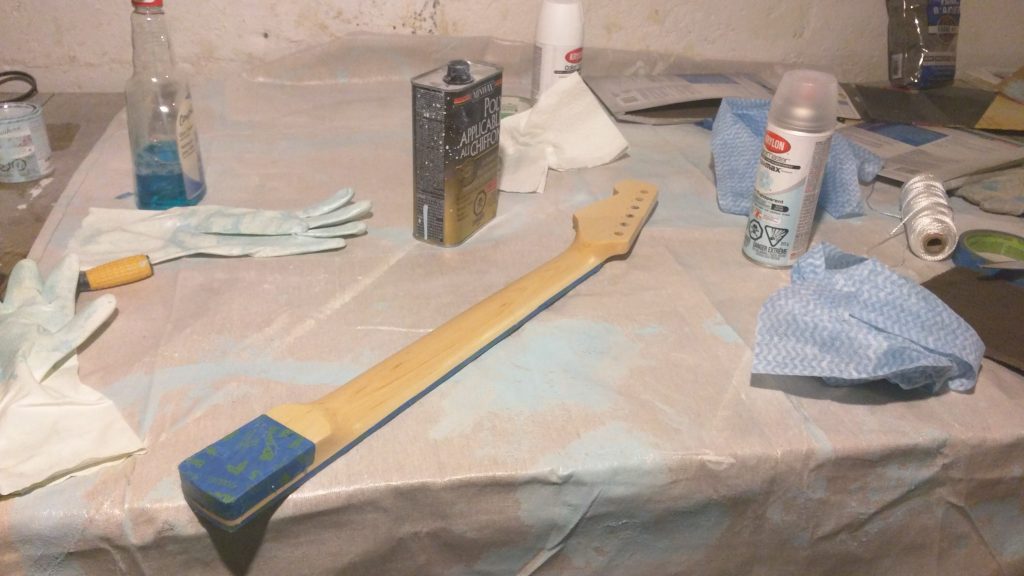
I sanded off all the poly resin using 220-grit paper and applied a light coat of the Minwax wipe-on satin poly I’d purchased from Home Depot. I repeated this four times, waiting three or four hours in between each coat, giving it a very smooth feel and a bit of a tint:
After I was satisfied that the neck was smooth enough, I removed all the masking tape. Great success! No challenges here, unlike the original stain job:
You can see a thin line in this photo near the screw holes—sort of a before and after shot. This is where the masking tape was. The heel—the part that fits in the neck pocket—felt rough to the touch, while just past the line felt smooth like butter, and looked much nicer, I thought.
Brad told me to give the clear coat on the body at least a week or so to dry before attempting to assemble anything, so that’s what I did… well, sort of. I’ve never been a patient person. It all worked out, though, because I ordered a number of parts for the assembly, and they took several days to begin arriving.
Putting Blue Bertha Together
It struck me as though I had done all the hard stuff by this point, but it turned out there were still plenty of challenges to come.
First and foremost, I removed the masking tape from the neck pocket, and bolted the neck and body together. That was pretty straightforward.
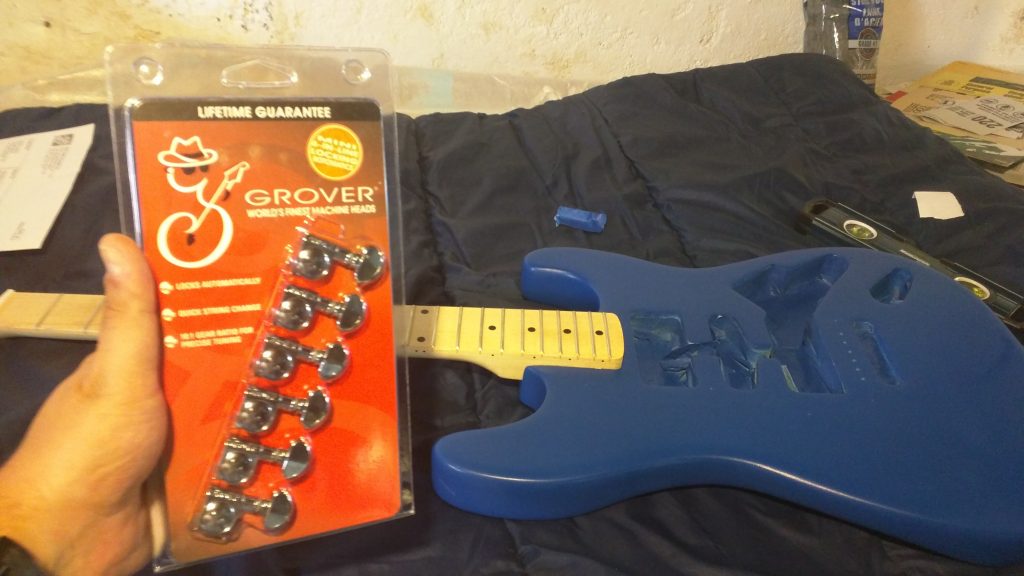
Next, I installed Grover Mini Locking Rotomatics (406 Series), which I had purchased for $71.05 CAD:
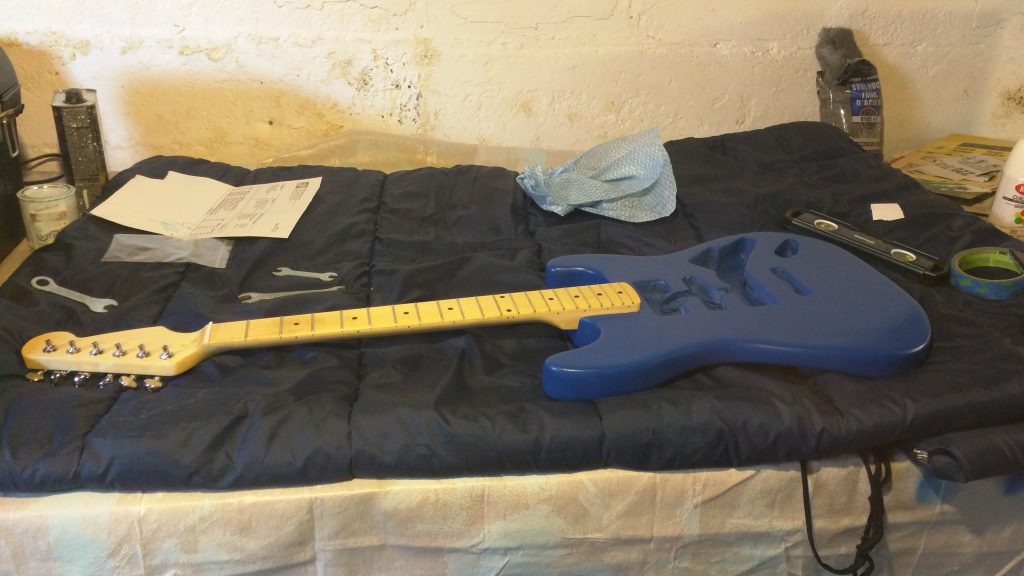
The pegholes were already drilled to the correct size (10 mm, I believe), and the screw holes were in the right location (about four o’clock), so this step was pretty easy:
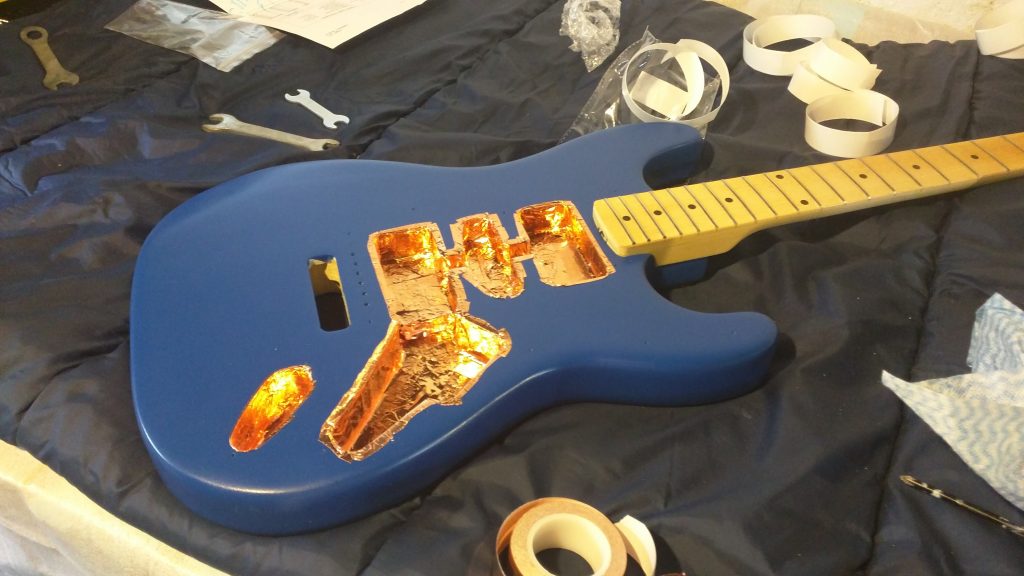
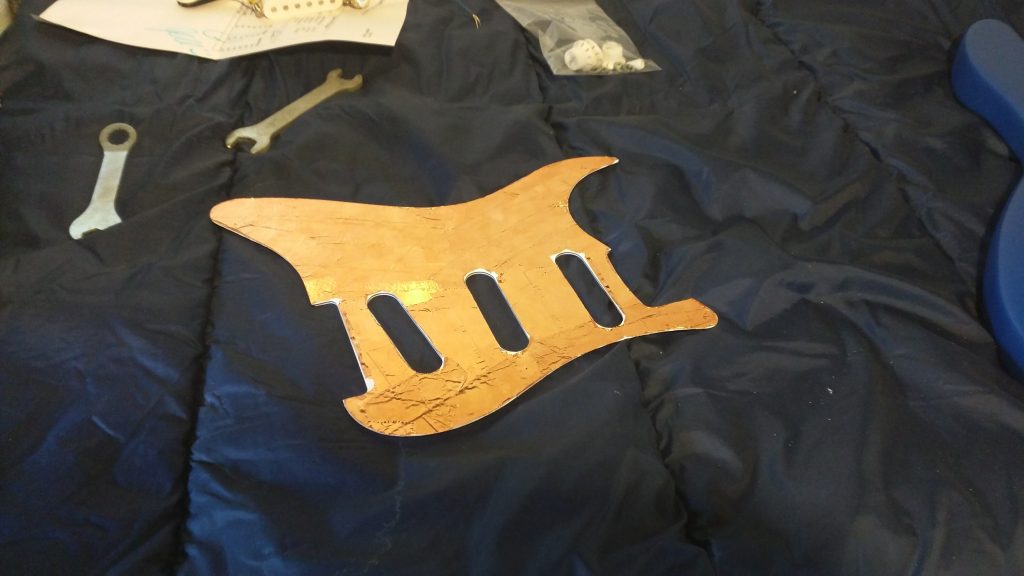
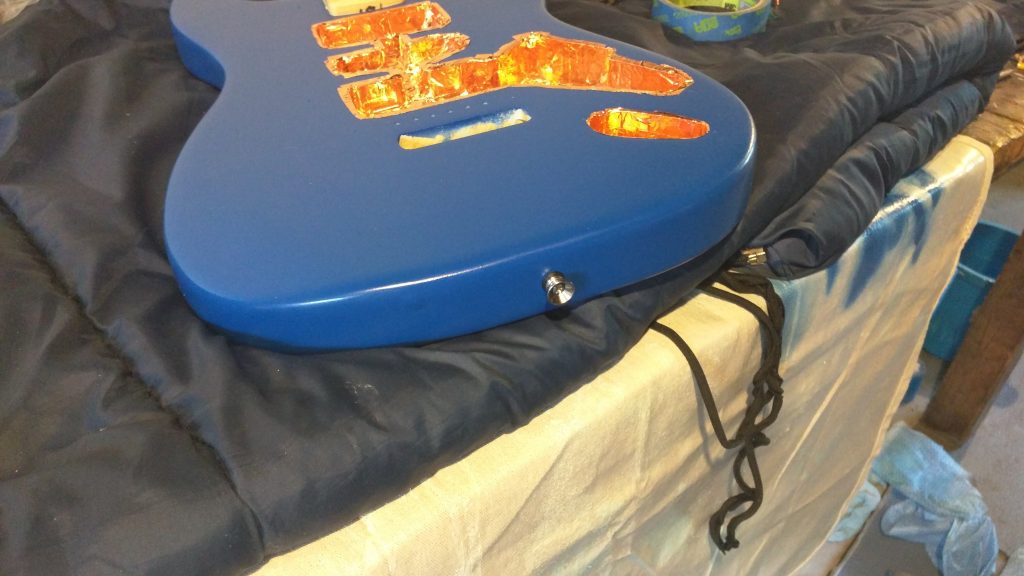
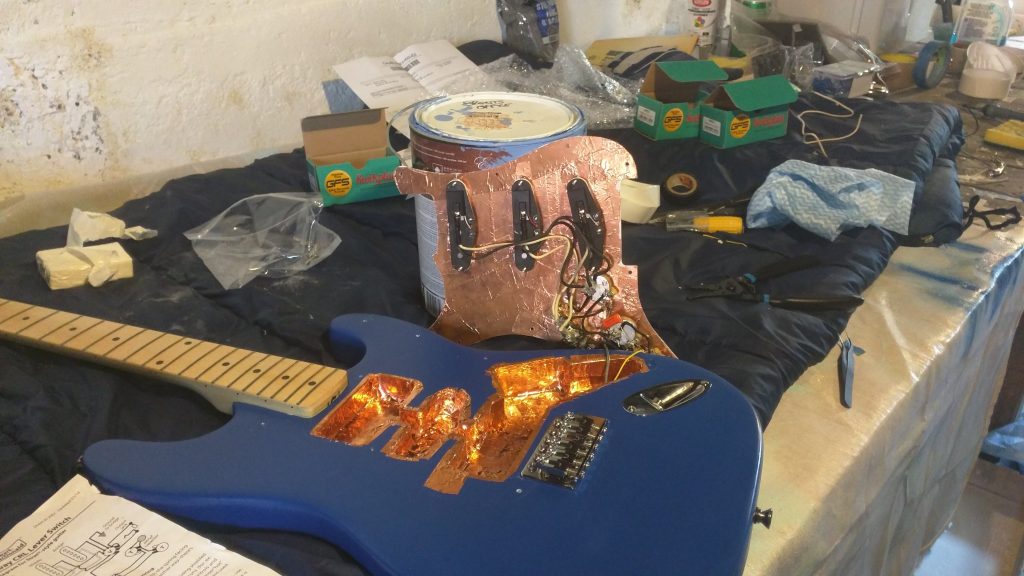
Next, I used copper tape I had ordered from Amazon—along with a soldering iron kit and a pair of wire strippers, a total of $53.88 CAD—to shield all the body cavities…
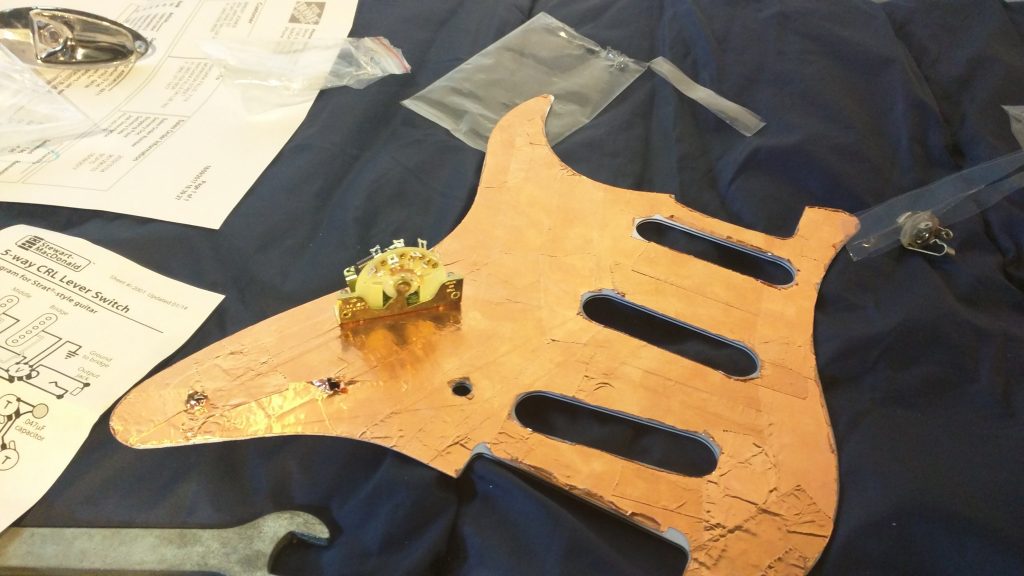
…as well as the back of the pickguard:
I had no idea if the copper shielding would do much to eliminate single coil pickup buzz, but plenty of guitar players online said it would, so I figured I had nothing to lose by trying.
I installed the strap buttons, too:
I had ordered a premium Stratocaster wiring kit for $57.19 CAD, which included wiring, three pots, an upgraded output jack, and a pickup selector switch. A 0.047uF orange drop cap, too.
To be clear, I knew absolutely nothing about guitar electronics—still don’t—except that buying more expensive wiring and stuff seemed like a good thing to do. I could have used what came with the kit, after all, but I wanted Blue Bertha to sound as good as she possibly could when finished.
I had never used a soldering iron before, and it seemed to me that each wiring diagram I looked at told a different story… or perhaps I was just reading them wrong.
I started installing the different components:
Then I got to the fun part—discovering that the holes for the tone and volume pots weren’t large enough to accommodate the CTS parts.
Luckily, I had the right size of drill bit to fix that. If I remember correctly, it was 3/8″ they needed to be. And I somehow managed to increase the size of each hole without cracking or destroying the pickguard.
Eventually, I got it all wired up, even though I found soldering to be trickier than it had looked online. The upgraded pickups I had ordered from Guitarfetish, GFS “Premium II” Alnico II, Hand Bevelled Strat Pickups ($64.95 USD), hadn’t arrived by this point, so I decided to use what I had from SOLO Music Gear just to get it all together.
I even put in the tremolo bridge included with the kit, even though I had a nicer one on the way.
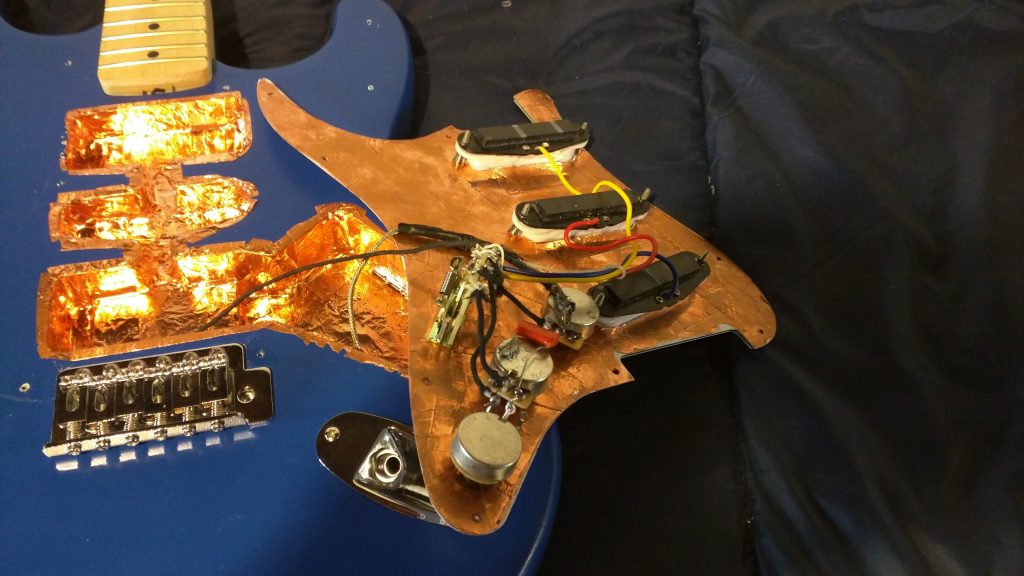
Here’s a peek at the finished electronics:
I did a quick test using a little practice amp and a metal screwdriver, and it appeared everything was working correctly, so I went ahead and screwed down the pickguard and the plate for the output jack:
I went to test again, and suddenly there was no sound.
I took me the better part of a half hour to realize that the output jack—the upgraded one I put in—was larger than what the kit originally came with. As a result, it was touching the the copper tape around the edges of the cavity—ever so slightly—which I guess caused the whole thing to short out or something.
I opened back up the output jack cavity, and stuck a piece of electrical tape where the jack was making contact. I screwed it back together, and lo and behold, it worked fine now.
I would later figure out that I had failed to ground everything to the volume pot correctly, let alone grounding the volume pot itself. If I turned the volume knob down to zero while playing, there would still be sound coming out the amplifier. I wasn’t really done with the electronics, but I thought so at the time.
I put on a set of cheap strings, just to test, and the pickups that came with the kit ended up sounding much better than I expected. Even though I had no intention to do a proper setup until I had the upgraded bridge installed, I did have to raise the string height a little, just to make the guitar playable.
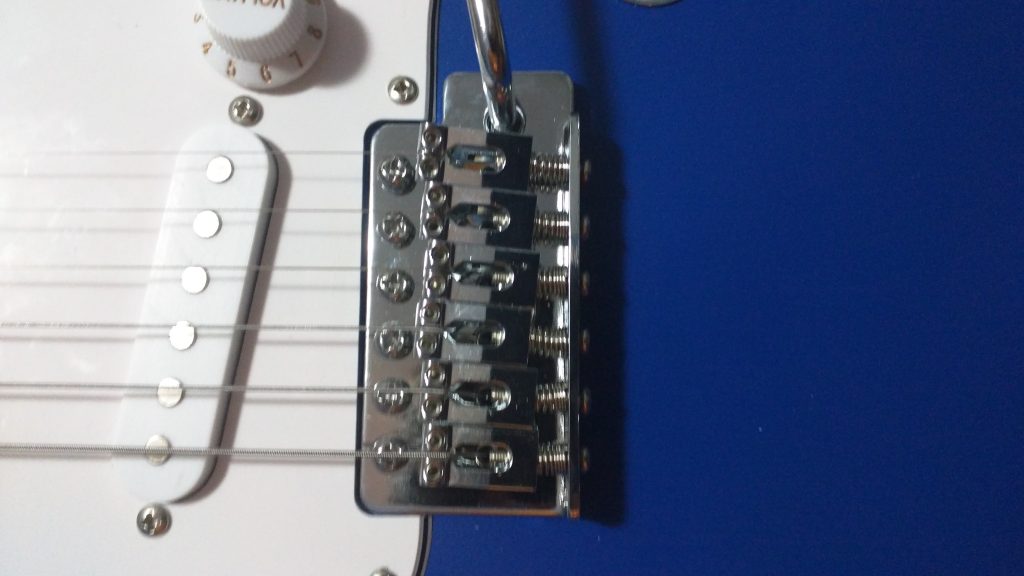
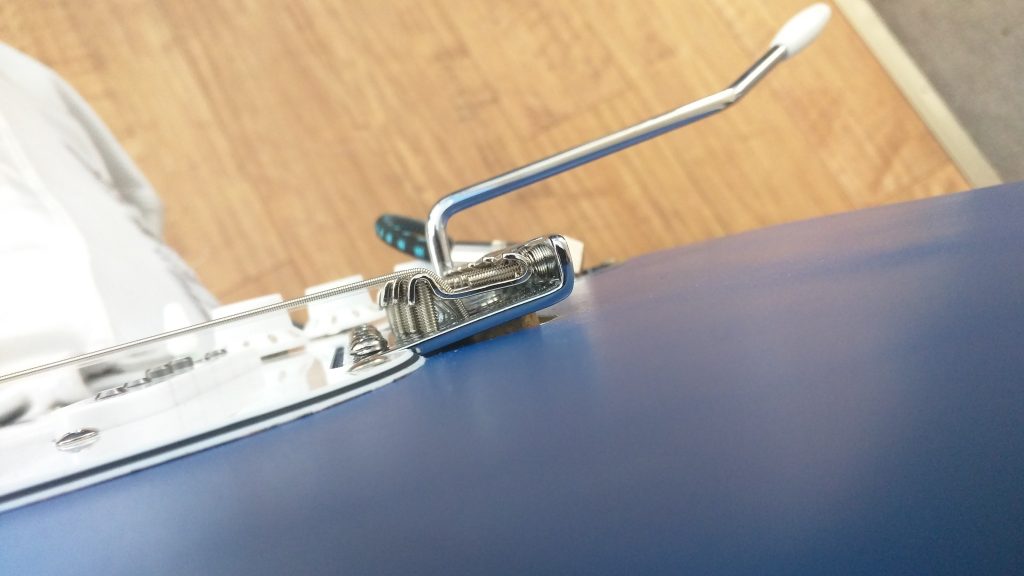
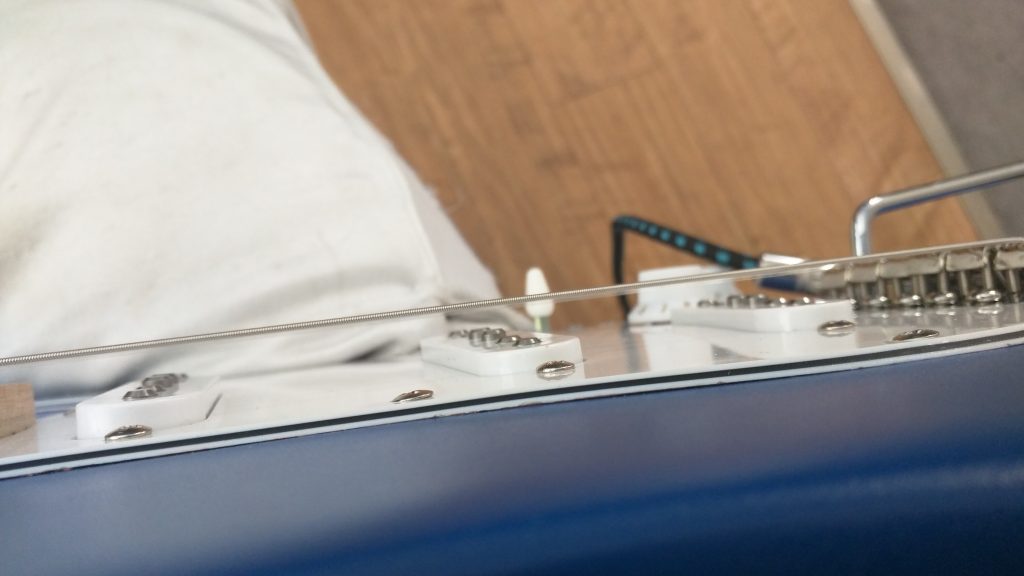
But doing so under string tension caused the saddles to shift hard to one side:
I had no idea if that was normal, but it confirmed my suspicion that replacing the bridge with something better was a good idea. The block in this one was some kind of cheap and lightweight metal, too, and the saddles seemed flimsy.
Anyway, Blue Bertha was now assembled and in a playable state for the first time:
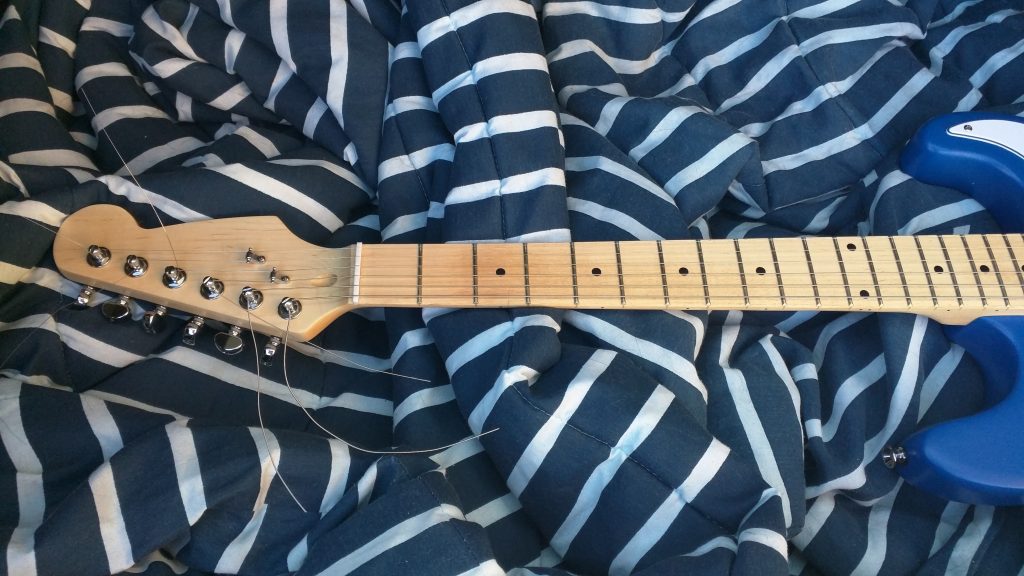
The kit came with W-shaped string trees—sometimes called guides or retainers—that I hadn’t installed, for two reasons. First, the holes for the trees weren’t pre-drilled in the headstock, and I didn’t have the correct size drill bit, let alone a steady hand or a drill press. And second, because I hoped to upgrade the trees to a roller style, in an effort to prevent string binding.
The next day or so, I took Blue Bertha to Central Music in Welland. There I met with Darren, who worked his usual magic, and installed two genuine Fender string trees for me. I also asked him to slot the nut correctly for 10-46 gauge strings. I considered for a moment paying to upgrade the nut—it was kind of a cheap plastic, and I thought a bone nut might improve tone and tuning stability. But I decided to give the plastic one a try. I could always upgrade that part later, if I really wanted to:
In all, my trip to Central Music cost me $30 CAD.
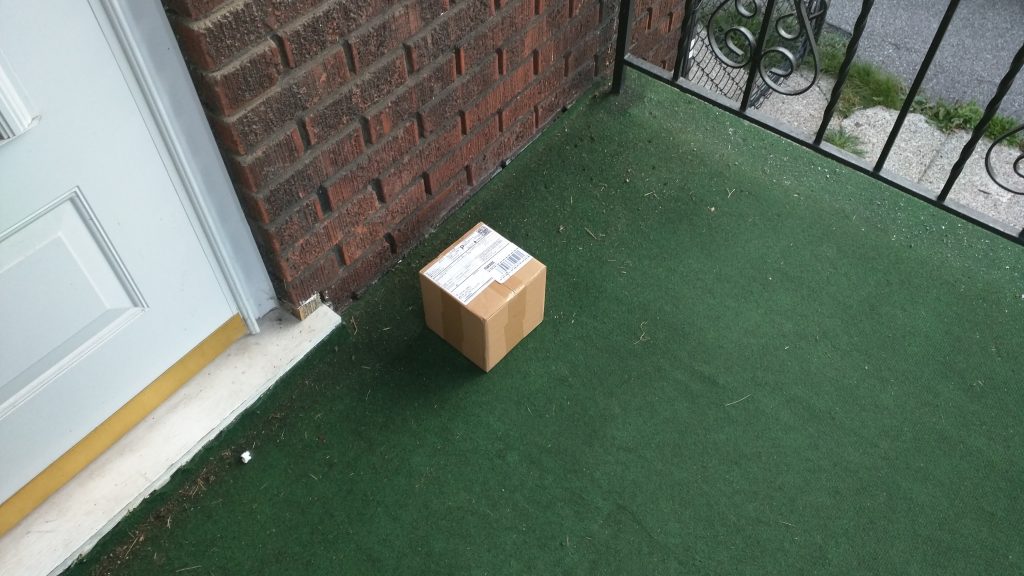
Well, good news arrived the next morning:
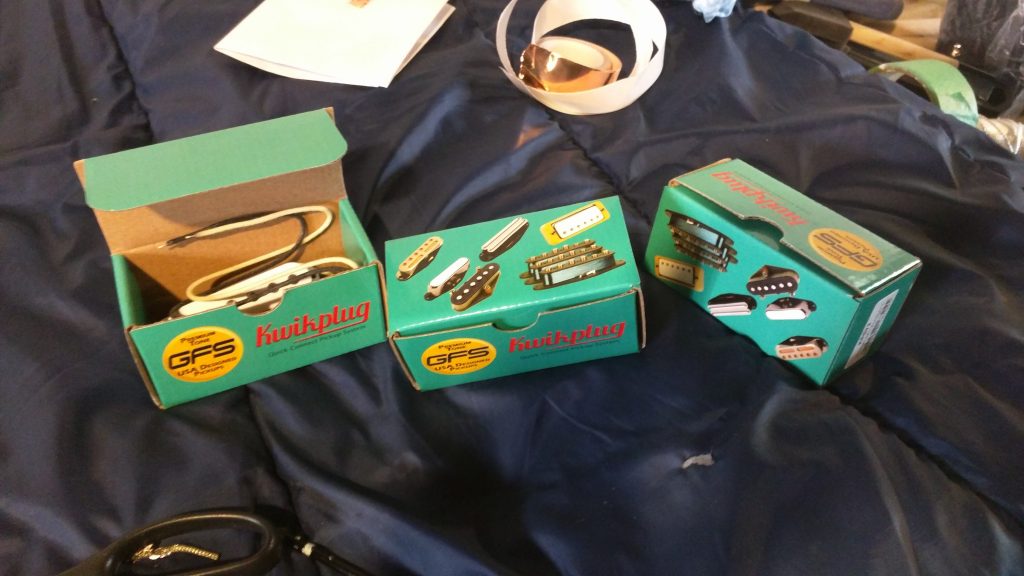
The last parts I needed had arrived—my pickups from Guitarfetish, referenced above, as well as a 10.5 mm Chrome “Shorty” Complete Tremolo ($37.95 USD), outfitted with a brass block. This not only meant I could put in the pickups I wanted to use, but it would give me a chance to go back and tidy up the wiring and ground everything properly.
Here are the pickups before going in:
I spent quite a bit of time before starting this build researching different pickup sounds. I liked the more vintage tone of Alinco II pickups—bright chimes without being shrill, the “quack” of positions two and four—as well as how staggered pole pieces shifted the balance between the strings. And it seemed, after doing some research, that GFS pickups from Guitarfetish offered good value, and the samples I had heard of their products on YouTube sounded close to the tone I was after.
I wasted no time getting the pickups installed. Here’s how the final wiring looked:
Almost there!
All I had left to do was install the bridge.
But first, I thought I’d better test the new pickups before screwing the pickguard back down. I plugged Blue Bertha into the practice amp, grabbed the metal screwdriver, and sure enough, all three pickups and knobs were working as expected.
I moved on to the last step—installing the new bridge—which I forgot to take a photo of, unfortunately. Let me describe what happened. I took out the old bridge, block, springs, screws, and claw, and was immediately impressed at how hefty the new bridge and brass block were by comparison.
I went to drop it in the opening, and that’s when I discovered the opening in the body was just a little too narrow. The six screw holes all appeared to be aligned correctly (52.5 mm string width), but the damn block just wouldn’t drop in. The gap in the pickguard was a little too narrow, too, to accommodate the width of the steel baseplate.
This is the exact point in the build that I should have taken a breather, got a snack, drank a glass of water, and returned later with a clear head. Instead, jacked up by how close I was to being done, I took strips of 100-grit sandpaper and pulled them back and forth at the edges of the opening, like a saw, until I took off enough wood from each side to easily pass the block through.
I had to trim the edges of the pickguard a little, too. But instead of taking the pickguard off and finding a way to make a clean cut, I took out a few screws, wedged it up with a screwdriver wrapped in masking tape, and hacked at it with a box cutter.
Frankly, I’m surprised I didn’t damage the finish on the body more than I did. Yes, I scratched the finish a little, as well as one edge of the pickguard, but all in all, the damage could’ve been worse. It’s hardly noticeable. You’d have to get close to see the evidence of my haste.
Besides, as I see it, I gave Blue Bertha a little bit of character right then.
About half an hour later, the bridge now fit everywhere it was supposed to. I screwed it in, soldered the ground wire to the claw in the back, and considered it a win.
I installed new Ernie Ball strings (10-46) and raced upstairs to begin the setup.
I adjusted the truss rod as well as the string height, intonation, and tremolo tension:
I applied a bit of lubricant to all the string contact points, and adjusted the pickup height to where I thought it sounded best:
I even took the spring from a ball point pen and dropped it in hole where the tremolo arm goes. It helps to keep the arm stiff, instead of having it rotate in circles with ease.
I put the plastic back plate on the guitar—covering the springs and claw—and now had a finished, functioning guitar…
…or did I?
Damn it.
The neck pickup suddenly wasn’t working.
“But I tested it,” I told myself. “How is this possible?”
I went downstairs, grumpy, irritated, took the strings off, took off the pickguard, and took a look around inside. Everything appeared to be in order.
I plugged it in. Tested it. Yes, the neck pickup was working.
I screwed down the pickguard, tested again. Now it wasn’t working.
I’m embarrassed to admit it took me the better part of an hour to figure out what was happening. The new switch I had installed went deeper in the cavity than the one that had come with the kit. So deep, in fact, that the extra little bit of pressure from screwing down the pickguard caused it to make the tiniest bit of contact with the copper tape at the bottom of the cavity.
I have no idea why this wasn’t an issue when I put in the first set of pickups, but either way, I solved the problem in much the same way as the output jack—a piece of electrical tape at the bottom of the cavity. I put it all back together again, and now all three pickups functioned correctly.
I was done. I was really done:
If I were to redo it now, of course, I could probably complete this same build in a fraction of the time, and I’d likely do a much better job.
It felt like Blue Bertha consumed all of my mental focus for days at a time. Needless to say, I didn’t get much writing done—let alone sleep—during the build, and the basement was a total mess.
Still, there was one final detail missing… a proper headstock decal! I ordered one off eBay from a guy named Bill. It cost me $10 USD and he designed it to my specifications. It went on great, just a matter of peel and stick:
And with that, the build was over.
I learned a lot, and I had a final product I was proud of. I’ve been playing it an hour or two every day since, and showing it off wherever I can. There’s something to making things yourself rather than buying them. Buying things is too easy, I think. We sometimes don’t appreciate purchased goods as much.
I hope this recount of building Blue Bertha was helpful to you, or, at the very least, interesting. If I can build a decent electric guitar, just about anyone can.
- Have you ever built something that challenged you?
- What went well, and what did not?
If you’ve ever completed a DIY project that you’d like to tell me about, please go right ahead and share it in the comments below.

